Free Construction Job Costing Template (Excel Download)
It’s built for residential contractors and trade subs doing under$5M in annual revenue. No macros, no complexity — just four tabs that worktogether to give you the visibility that spreadsheet chaos never could.
For context on what job costing is and why it matters forcontractors, read our complete guide to construction job costing.
What’s Inside the Template
The template has four tabs, each with a specific job:
| Tab |
Purpose |
What You’ll Find |
| Instructions |
Getting started |
Color coding guide, tips for consistency, and the 24-hour rule for logging costs |
| Job Setup |
Project info + budget |
Project name, customer, contract amount, and estimated budget broken down by 7 cost codes (labor, materials, subs, equipment, permits, overhead, contingency) |
| Cost Log |
Daily expense tracking |
Date, cost code, vendor, category, amount, PO/reference number, and notes. Pre-loaded with 6 sample entries showing how to log labor, materials, sub invoices, equipment, and permits |
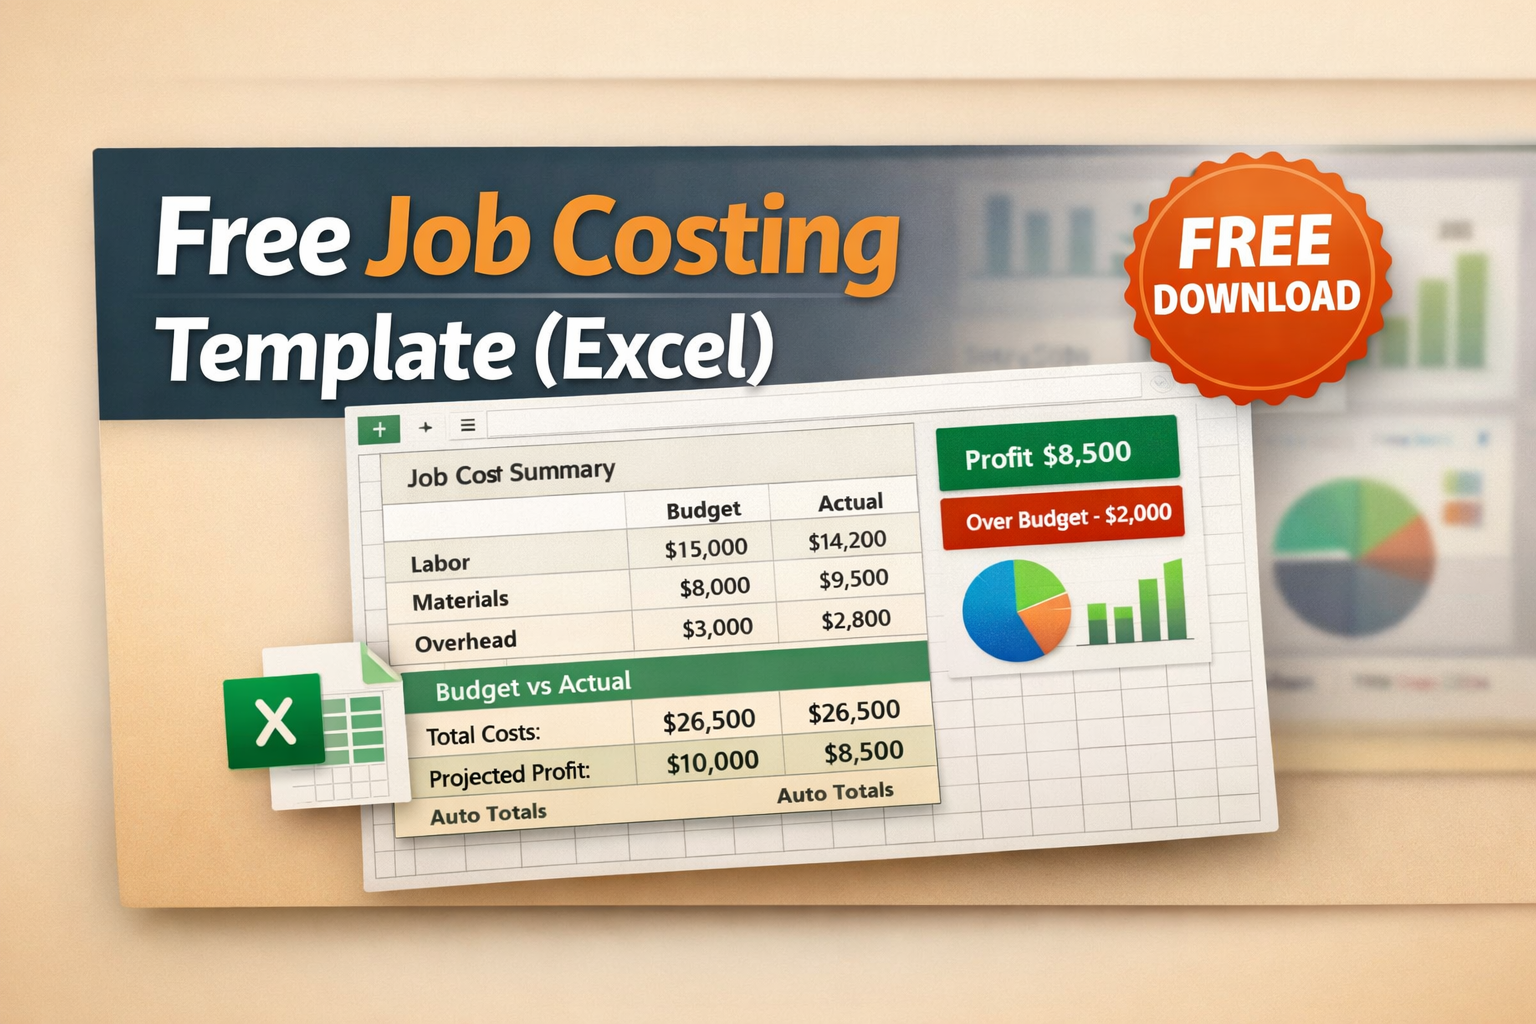
| Job Summary |
Budget vs. actual dashboard |
Auto-calculated estimated vs. actual by cost code, dollar and percentage variance, over/under status flags, plus summary metrics (contract amount, margin, % of budget spent) |
The Job Summary tab is where the magic happens. You fill in the JobSetup and Cost Log tabs; the summary auto-calculates everything else. No manualmath, no formula building — just honest numbers about how your job isperforming.
How to Use This Template (Step by Step)
1. Fill Out Job Setup
Start by entering your project details: customer name, address,contract amount, and start date. Then fill in your estimated budget for eachcost code. These yellow-highlighted cells are the inputs that drive your entirebudget vs. actual comparison.
If you’re not sure how to estimate, start with your last completedjob. What did you spend on labor? Materials? Subs? Use those real numbers asyour starting point and adjust for the new project’s scope.
2. Log Every Cost Daily
This is the hardest part — not because it’scomplicated, but because it requires discipline. Every expense needs to belogged in the Cost Log within 24 hours: the date, which cost code it fallsunder, who you paid, how much, and a reference number (PO, invoice, or receiptnumber).
- Labor: Log hours daily. Multiply by hourly rate (including burden). Assign tocost code 100.
- Materials: Log every Home Depot run, every lumber delivery, every box of screws.Assign to code 200.
- Sub invoices: When a sub sends an invoice or you make a progress payment, log it undercode 300.
- Equipment: Rentals, fuel for equipment, tool purchases allocated to this job — code400.
- Everything else: Permits (500), overhead allocation (600). Don’t skip these — they’rereal costs even if they don’t feel like it.
The Discipline That Pays
Contractors who track job costs consistently report 8–12% better margins than those who don’t. Not because tracking changes your costs — but because seeing the numbers in real time changes your decisions. You catch a material overrun at week 2, not month 3.
3. Review Job SummaryWeekly
Every Friday, open the JobSummary tab. It automatically shows you:
- Variance by costcode: Are you over or under budget on labor?Materials? Subs? The dollar and percentage variance tells you exactly where youstand.
- Overall status: Green means under budget. Red means over. At a glance, you know if thejob is healthy or bleeding.
- % of budget spent: If you’re 60% through the budget but only 40% through the work, that’s ared flag you can act on now — not after the job is done.
Cost Codes in the Template
The template uses 7 standard cost codes designed for residentialcontractors and trade subs. Here’s what each one tracks:
| Code |
Category |
What to Track Here |
| 100 |
Labor – Field |
Crew wages, overtime, labor burden (taxes, insurance, workers’ comp). Assign hours to specific jobs daily. |
| 200 |
Materials |
Lumber, pipe, fixtures, concrete, fasteners, consumables. Log every receipt, every purchase order. |
| 300 |
Subcontractors |
Electrical, plumbing, HVAC, painting, concrete subs. Log each invoice and progress payment. |
| 400 |
Equipment |
Rentals (excavators, lifts, scaffolding), fuel, small tools. Allocate to the job that used them. |
| 500 |
Permits & Fees |
Building permits, electrical permits, inspection fees, plan review fees. Usually front-loaded. |
| 600 |
Overhead Allocation |
Your share of insurance, vehicle costs, office rent, and admin time allocated to this job. Most contractors use a flat % of total cost. |
| 700 |
Contingency |
Buffer for unknowns. Budget 5–10% of total estimated cost. Don’t touch it unless you actually need it. |
You can rename or add cost codes to fit your operation, but werecommend starting with these seven. They cover 95% of what small contractorsspend money on, and keeping the list short means you’ll actually use itconsistently.
5 Tips to Get the Most Out of This Template
- Don’t skip the smallpurchases. That $47 trip to Home Depotdoesn’t feel material, but 20 of those trips is $940 in untracked costs. Logeverything.
- Use the Notes column.Future you will thank present you. “Home Depot”tells you nothing. “2x6x10 framing lumber for garage header” tells you exactlywhere that money went.
- Set a recurringFriday calendar reminder. Review the JobSummary tab for 5 minutes every Friday. That’s it. Five minutes of looking atreal numbers can save thousands in margin erosion.
- Compare completedjobs. After each job, save a copy of the template.After 3–5 jobs, you’ll have real data on what things actually cost — whichmakes your next estimate dramatically more accurate.
- Know when to upgrade.This template works great for 1–3 active jobs.If you’re running 5+ jobs simultaneously, or you need your team to log costsfrom the field, it’s time for dedicated software. See our software comparisonto find the right fit.
When You’ve Outgrown This Template
This template is a starting point. Here are the signs it’s time forsomething more:
- Multiple active jobs:Managing separate files for each project getsmessy fast. Dedicated software tracks all jobs in one place.
- Team size: If more than one person needs to log costs, a shared spreadsheet becomesa version control nightmare.
- QuickBooks sync: Manually re-entering data from this template into QBO is double work.Integrated tools eliminate it.
- Real-time visibility:Spreadsheets show you where you were. Softwareshows you where you are right now.
When you hit these walls, tools like Ontraq give you everything in this template — cost codes, budget vs. actual, dailylogging — but automated, synced with QuickBooks, and accessible from yourcrew’s phones in the field. At under $50/mo, it’s an easy next step when thespreadsheet can’t keep up.
Download and Get Started
[Download the free job costing template →]
→ Complete guide to construction job costing
→How to set up job costing in QuickBooks
→ Compare job costing software options


 Receipts ManagementAccounts PayableGPS TimsheetsActual vs. BudgetsReal time ProfitabilityQuickBooks Integration
